An epic 23-mile hike to a 14,042-foot summit in 17.5 hours
This is a recap of my recent hike to the summit of Mt. Langley in California’s beautiful Sierra Nevada mountain range. After summarizing the hike, I also lay out my gear, nutrition and lessons learned.
—
The original plan was to summit Mt. Whitney, the highest peak in the contiguous U.S. I had secured the coveted overnight passes for Mt. Whitney Trail by snatching up a handful of unclaimed permits when they were released online on May 1.
The great part about registering for an unclaimed-permit is that you are guaranteed your permit, and not left holding your breath, hoping the permit lottery shakes out in your favor. The bad part is that you need to be flexible with your dates: these orphaned permits are released on a first-come first-served basis and they go fast.
I went to the website the morning of May 1 aiming for something in mid to late June. After refreshing the page a few times I saw permits pop up for Wednesday, June 23 and I registered right away.
Then I shouted, “Yeeeaaahhhhh!” and pumped my fist a few times — Mt. Whitney, baby! This would be my second time tackling Mt. Whitney, a 22-mile hike that climbs more than 6,000 feet to a summit at 14,505 feet.
I summited Mt. Whitney in 2018 and it was one of the best hikes ever. I’ve been bragging about it, chasing the dragon, and hoping to go back ever since.
Now that I had the permits for a 2021 attempt, all I had to do was plan the trip, enlist some friends to join, and gear up. True to my lazy form, I procrastinated and waited until early June to get the ball rolling.
At first, I admit, I had some buyer’s remorse: I felt silly driving all the way to California to go hiking when I have the Rocky Mountains right in my back yard. But when I found a couple buddies who were eager to go, I snapped out of the funk pretty quickly and got back to geeking out about the adventure. I spent the next few weeks buying gear, mapping out campsites, and meal prepping.
Then on Sunday, three days before our hike, and the day before the start of my road trip from Colorado to California, I got an email from the Forest Service announcing Whitney Portal (our campsite, and the starting and ending point of the hike) was being evacuated due to the Inyo Creek Fire.
Big-time bummer. But the show must go on. We decided to stay the course, keep our fingers crossed the fire would be contained by Wednesday, and come up with a nearby Plan B if Mt. Whitney did in fact get canceled.
So I drove west seven hours from Colorado and stopped over at a great roadside camping spot in Utah’s Fish Lake National Forest. The next day I woke up early and drove another eight hours to Lone Pine, CA, where I checked in at the Eastern Sierra Visitors Center, learned Whitney Portal was still closed, and got my head around some Plan B options.
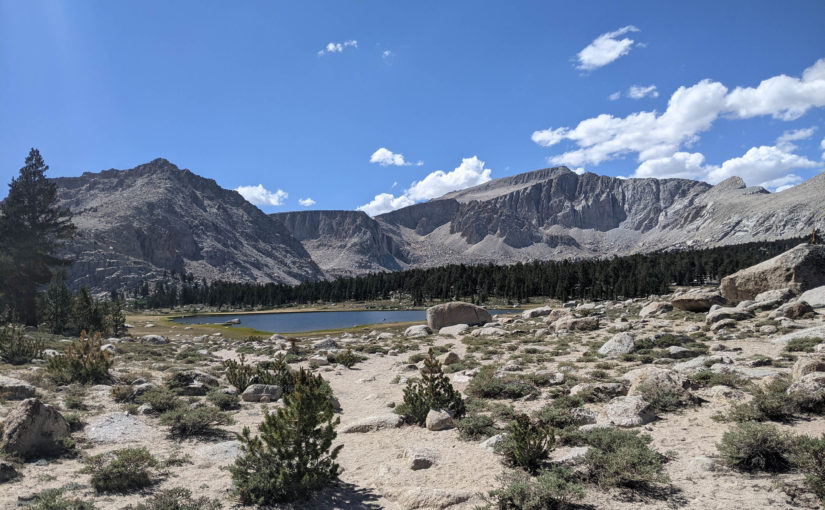
Mt. Langley from Cottonwood Lakes Trailhead
We all wanted to try and bag a summit on this trip, even if it wasn’t Mt. Whitney, and Mt. Langley checked pretty much all the boxes.
At 14,042 feet, Mt. Langley is the southernmost fourteener and a close neighbor to Mt. Whitney. Fortunately, the Inyo Creek Fire was not threatening the Mt. Langley summit, trail or access point from Cottonwood Lakes Trailhead Campground, which was only a 40-minute drive from the Eastern Sierra Visitors Center in the town of Lone Pine.
The hike weighs in at roughly 23 miles[efn_note]This is the official mileage; my watch recorded 26 miles, but it may have been be a bit off, and we did a good amount of wandering at times that could have added to the mileage.[/efn_note] round trip with about 4,600 feet of elevation gain. So it would be a bit longer than the Mt. Whitney hike, but without as much elevation gain — challenging, but definitely doable.
Ideally we would split the hike into two days by knocking out a good chunk on the first day, camping at one of the lakes along the way (Cottonwood Lake #1, #2, Long Lake, or High Lake), pushing for the summit in the morning and coming all the way back down on the second day.
The wrench in this Plan B was that a permit is required to camp along the trail and there were only two permits available for our party of three.
This led to the Plan B.1 no-permit workaround: start at midnight and crank out the whole hike in one day.
The friendly folks at the Eastern Sierra Visitors Center endorsed that idea, mentioning that many people go that route when they don’t have permits. I got the vibe, again, of a challenging but definitely doable endeavor.
Another benefit of this Plan B.1 was that our packs would be much lighter because we wouldn’t need to carry bear canisters with us since we wouldn’t be camping along the way.
So with all in agreement to go extreme and tackle Mt. Langley in a day, we set up camp at Cottonwood Pass Campgrounds (nextdoor to the Cottonwood Lakes Trailhead), ate dinner, and tried to relax and sleep a bit before our midnight departure.
These campsites — Cottonwood Lakes Trailhead Campgrounds and Cottonwood Pass Trailhead Campgrounds — were perfect for this kind of trip because they’re walk-in and only $6 per night, with running water, bear lockers, and vaulted toilets. They’re designed for hikers who are passing through or just looking for a convenient and flexible place to camp for the night in between hikes.
Quick digression to complain about lack of camping etiquette:
These walk-in campgrounds are specifically not intended for extended stays or big camping weekends where you post up, unload a few 30-packs of Natty Light, and hang around the campfire shooting the breeze for a few days.
It was disappointing to see a number of groups seemingly doing just that, loudly, late into the night, while we were trying to snag a precious hour or two of sleep after the sun set before our midnight hike.
Now, I’m not one to shake a stick at a weekend of campfires and Natty Light binges; but there are many other campsites in the area designed specifically for that style of camping. I suppose, like us, these folks might have been driven by the fires from their original campsites to the walk-in campsites and they were just making due.
Either way, if you’re considering camping at one of these walk-in campsites, please be courteous and respect their intended uses.
End rant.
The hike: 23 miles, 17.5 hours
I got a deep and glorious 45 minutes of sleep after our neighbors finally went to bed around 11 p.m. Then I happened to wake up right at midnight and it was go time.
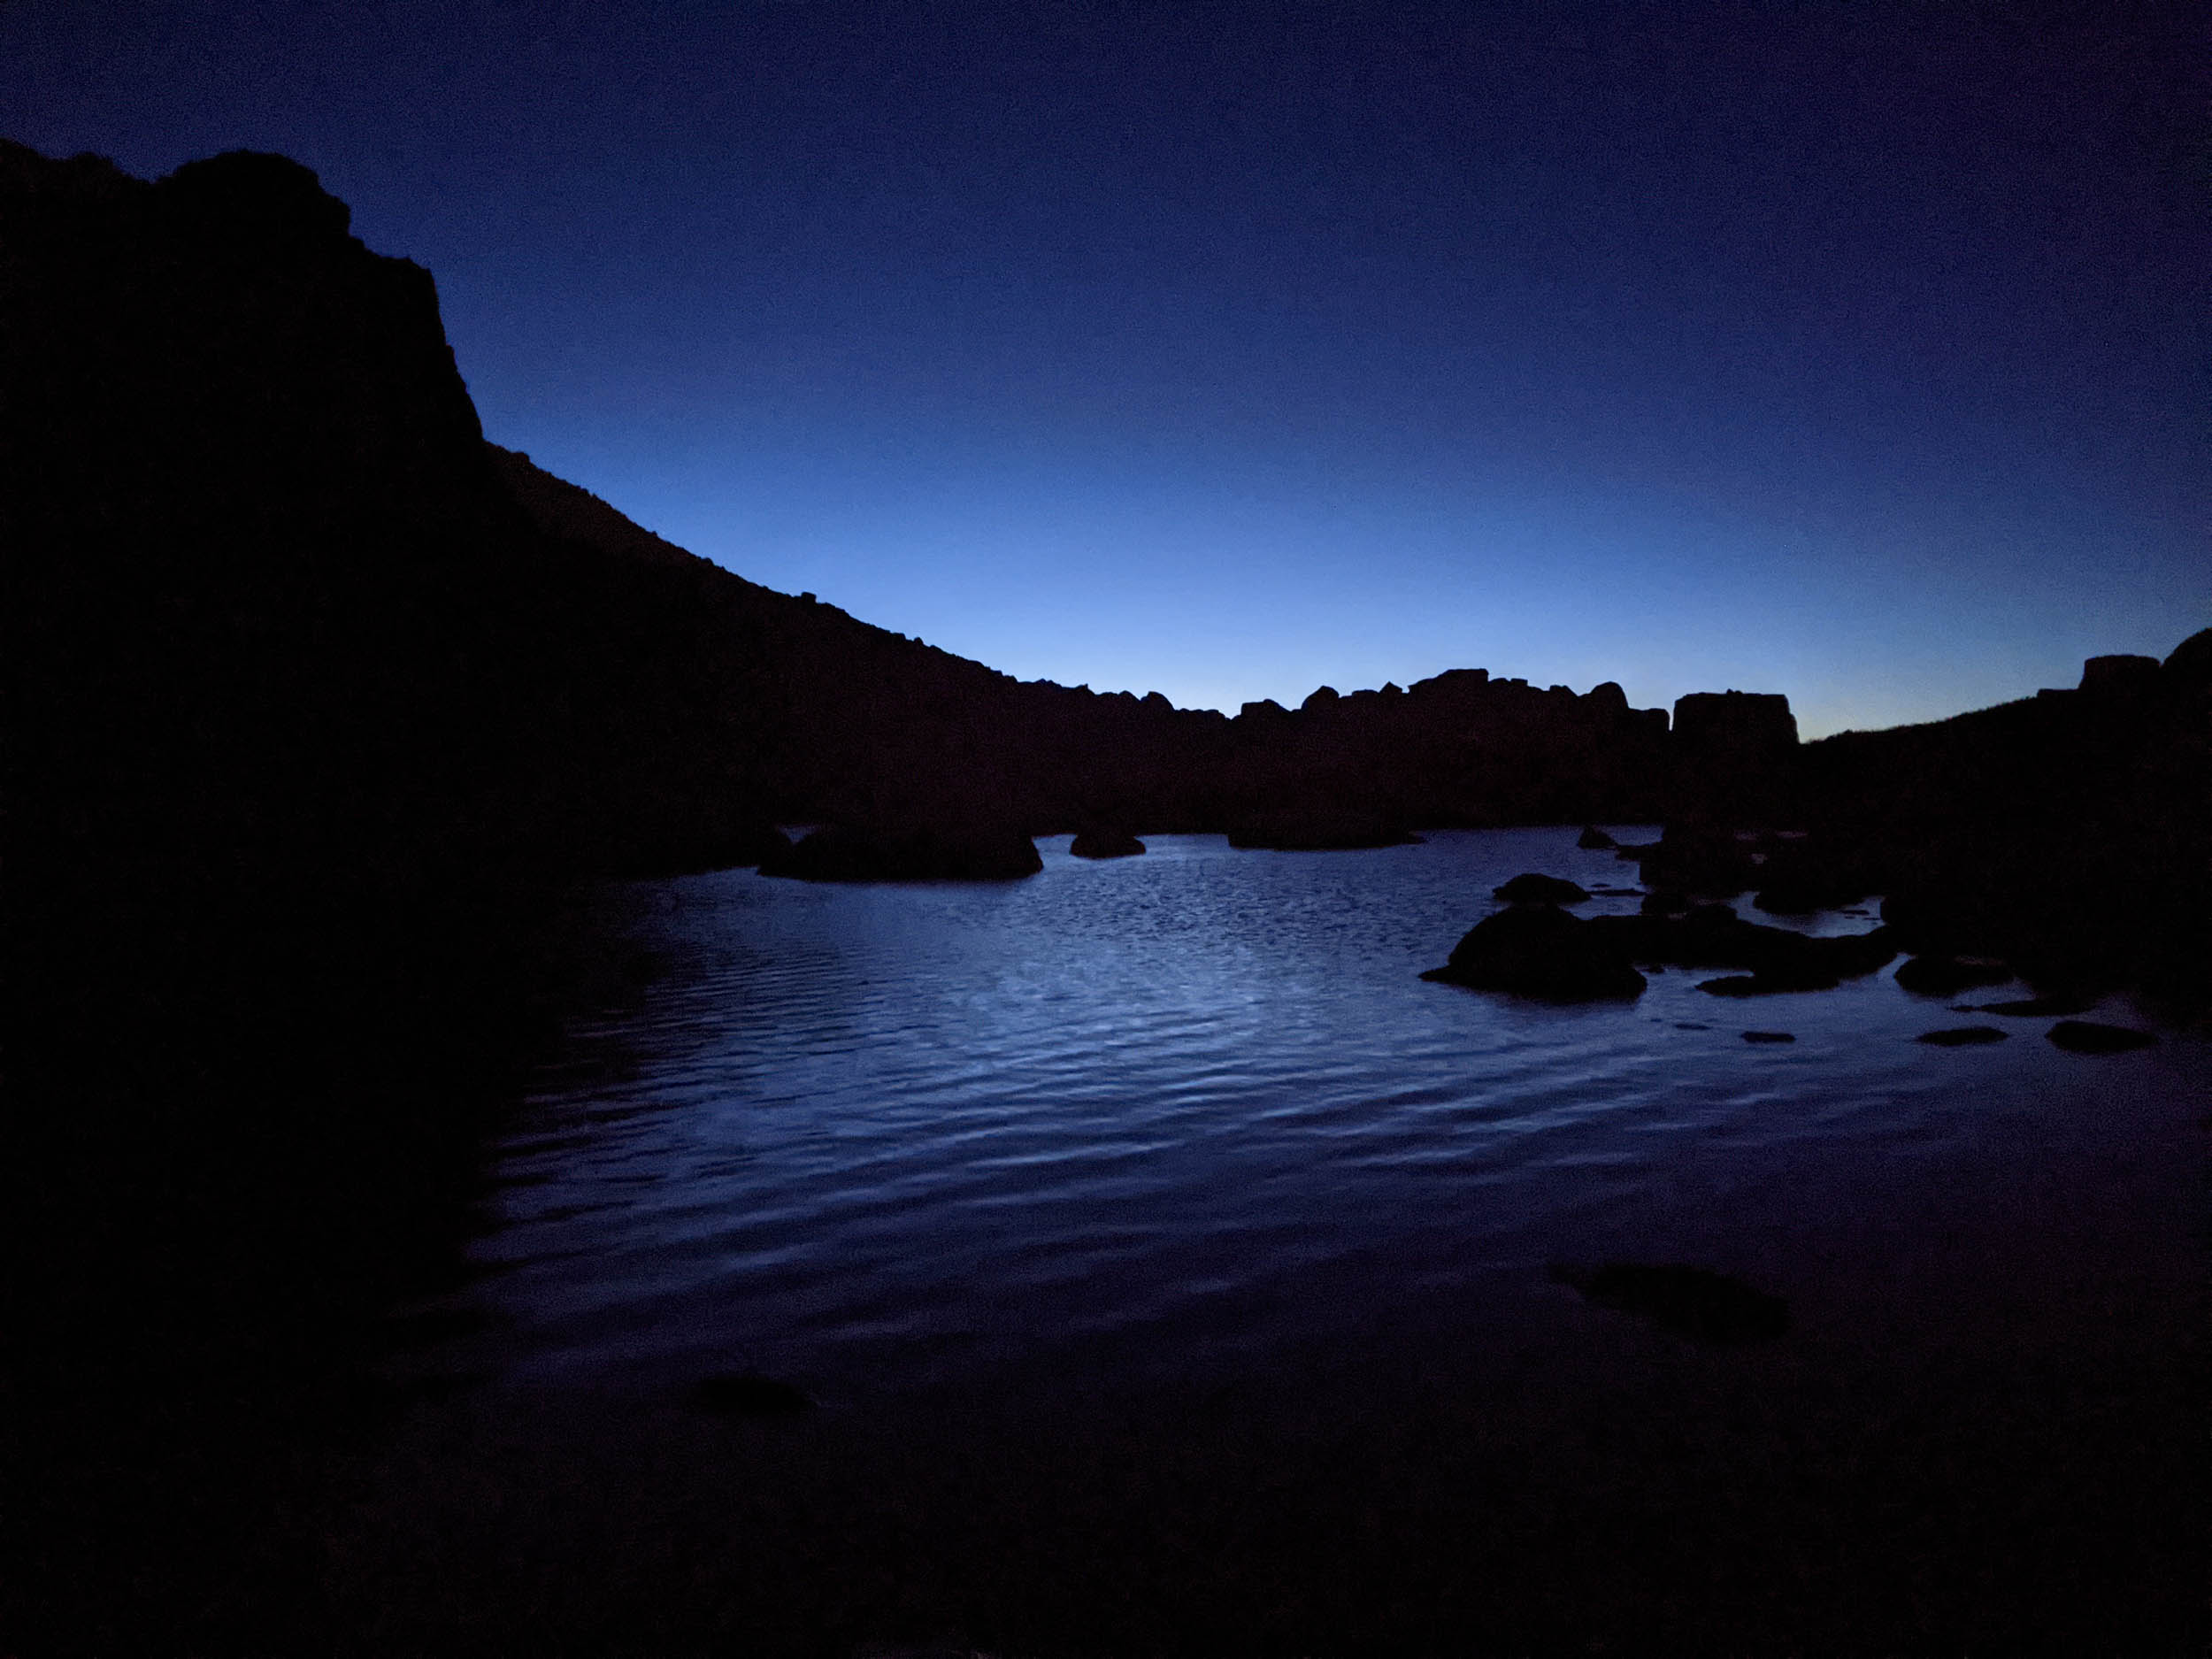
We geared up quietly and hit the trail at 12:30 a.m. The moon was nearly full and it lit up the trail and granite mountains around us; if not for some shadows cast by the trees, headlamps were pretty much unnecessary.
I take that back: headlamps were great for spotting wildlife in the dark — shiny green eyes appeared magically, and terrifyingly in meadows and behind trees at several points during those early hours of the hike. Every time I saw them my heart jumped; I was certain they were bears or mountain lions ready to devour us. Thankfully they all turned out to be deer, calmly going about their business, wanting nothing but peace, and nothing to do with us (as I grabbed rocks for protection and braced for a fight to the death).
We hiked — through forested areas, alongside lakes, and across fields of shining granite under a dark sky and bright moon — from Cottonwood Lakes Trailhead, along Cottonwood Lakes Trail, to New Army Pass Trail, and eventually up to High Lake.
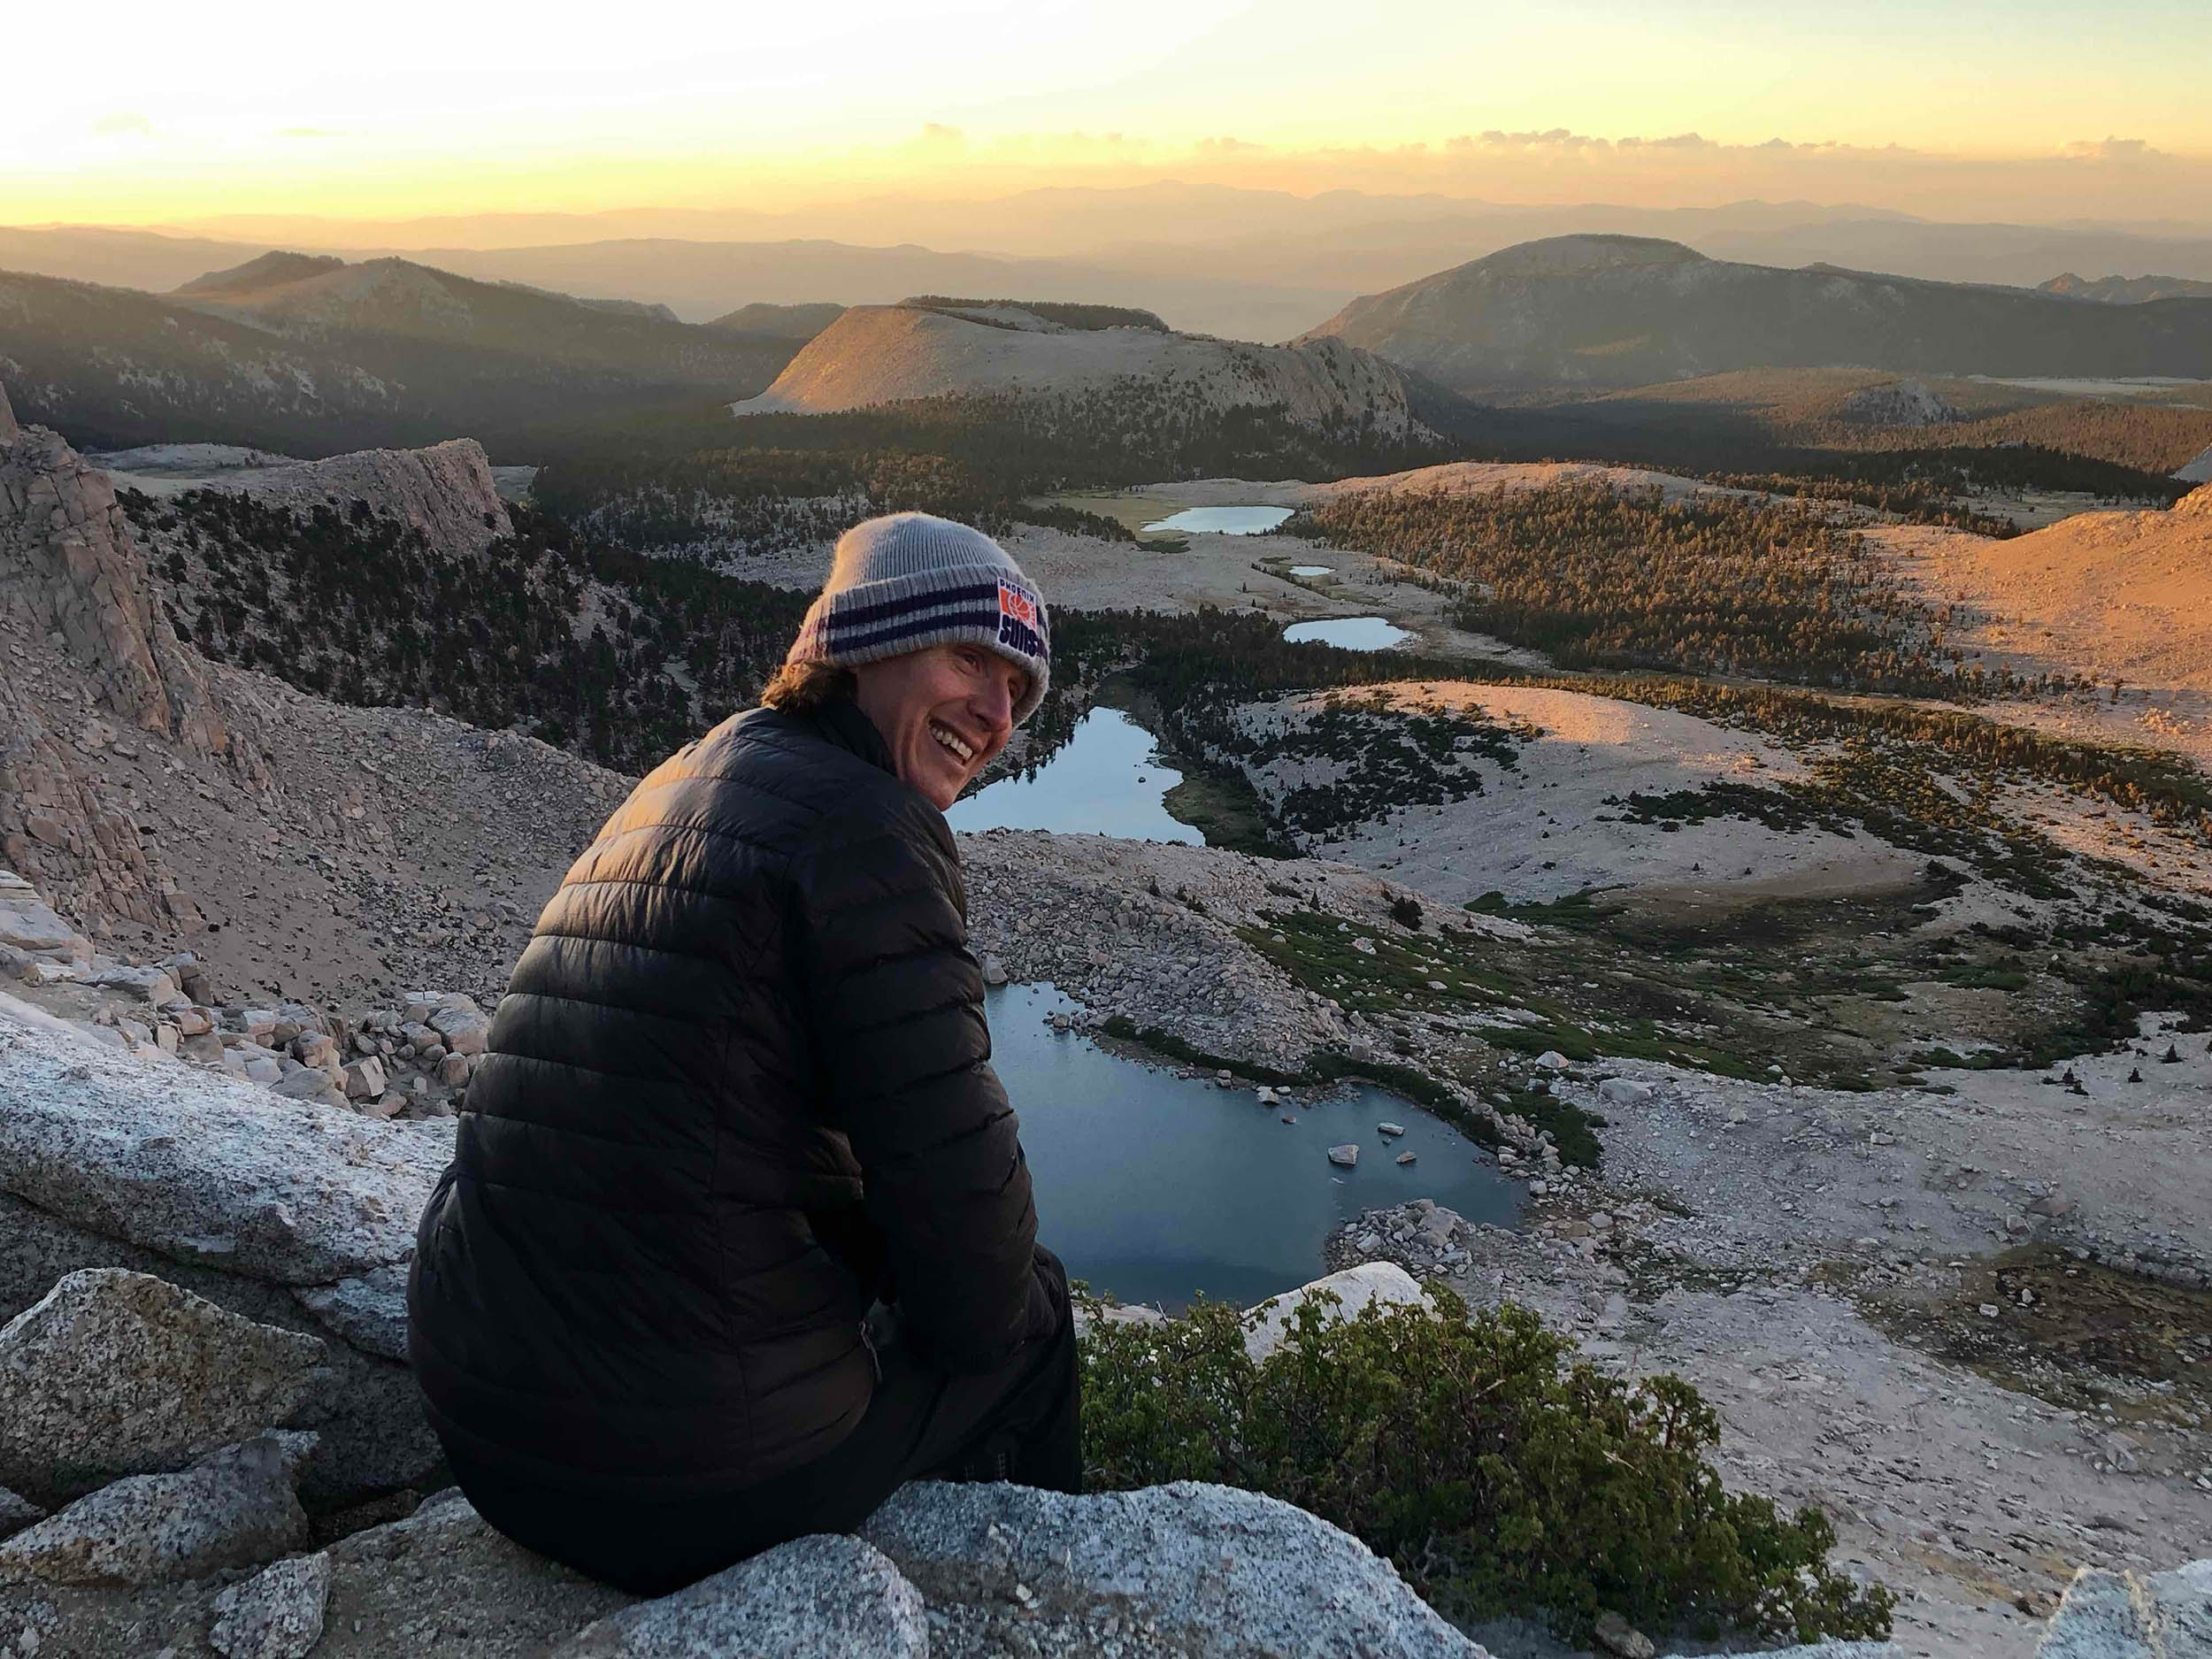
We stopped at High Lake to refill water bottles and take in the early moments just before sunrise. Then we embarked on our first big climb — nearly 1,000 feet of elevation gain up steep switchbacks — as the sun rose and the elevation started to weigh us down. Aside from the summit, this was my favorite part of the hike. It was beautiful to watch the sun rise and the sky’s colors change, from the side of a mountain, looking out over lakes below and the ridges surrounding us.
After climbing to the top of the ridge — which was about 8.4 miles from the trailhead where we started — the trail then descended about 600 feet on the other side. We followed it down to a saddle and then back up for an intense push to the Mt. Langley summit, with roughly 2,000 feet of elevation gain over 3-ish miles.
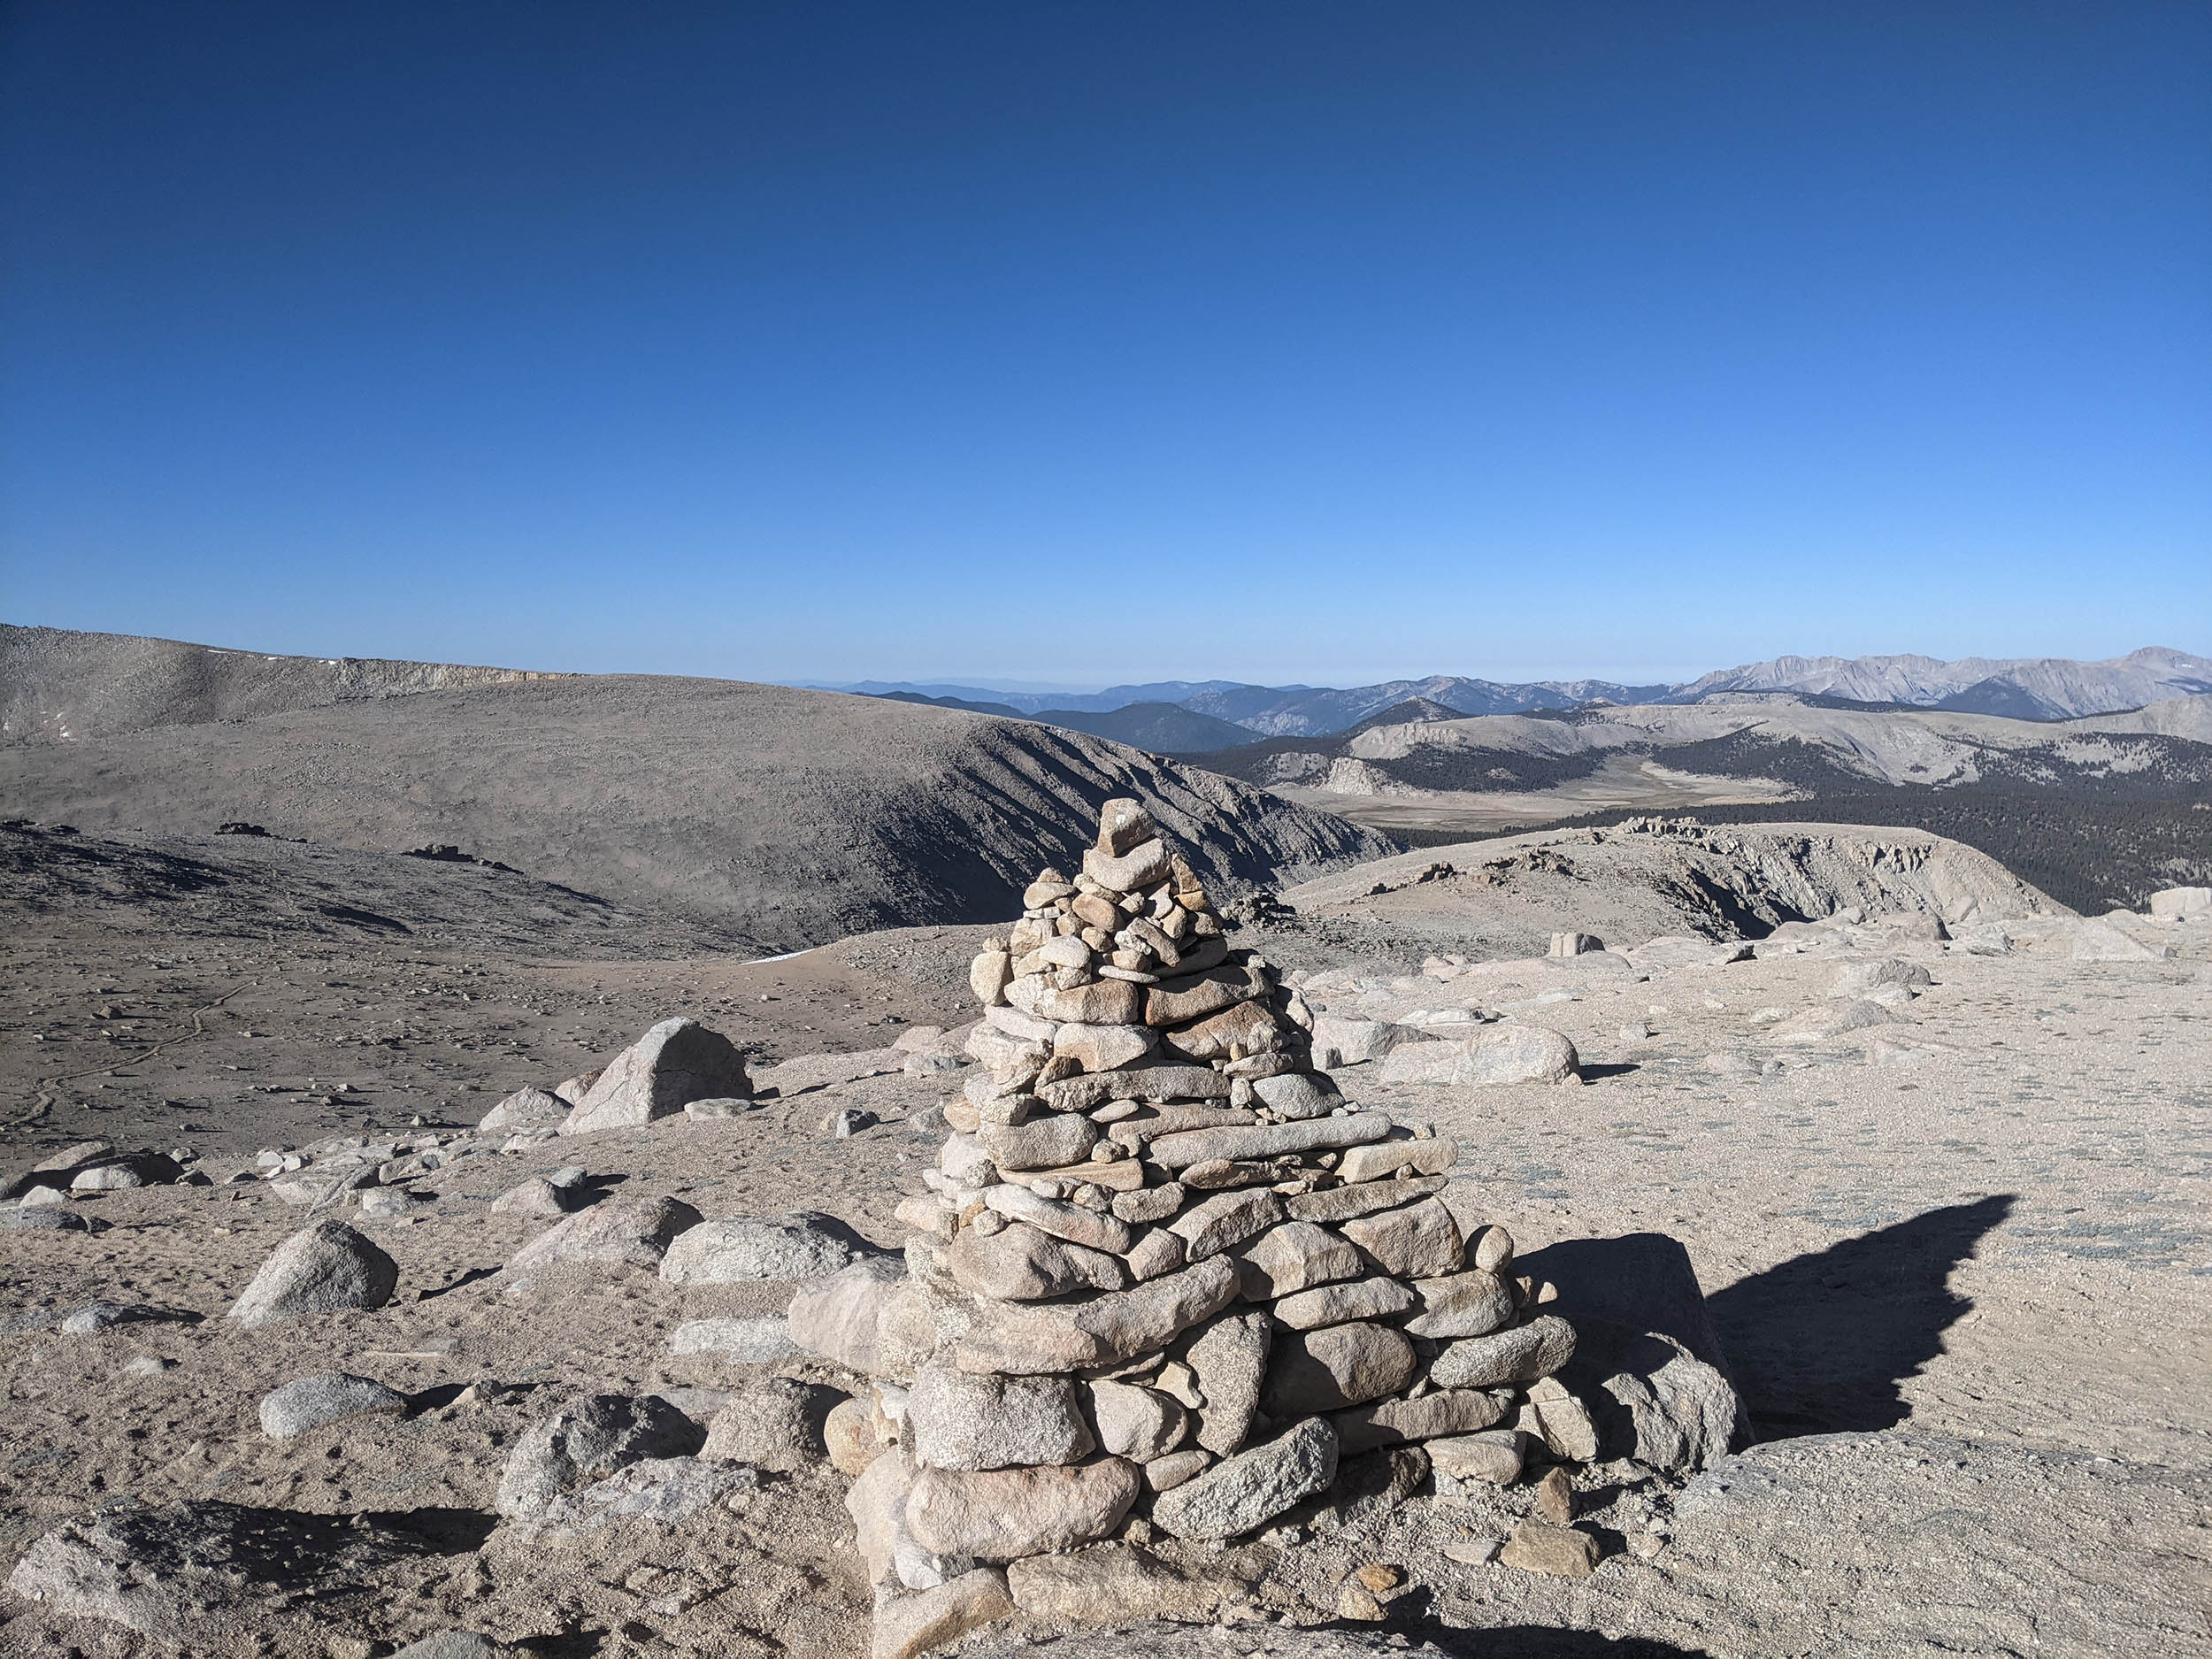
This last section of trail to the summit was not marked by signs. Instead there were cairns — big pyramid-shaped piles of stones — marking the route to the top. These were pretty easy to spot, and made it relatively easy to stay on track.
The tough part was just the intense incline of that final stretch, combined with lots of scree, and of course the elevation. Also, the last mile was really tough and demoralizing. Every time I approached a cairn I was sure it would be the last one. Then I’d get to the cairn, look up, and see another one lying up ahead even further, with more and more and more and more climbing.
Every new summit push seems to be the toughest one, but from what I can remember, this was a much more challenging summit than Mt. Whitney, which I don’t remember having as much scree to contend with.
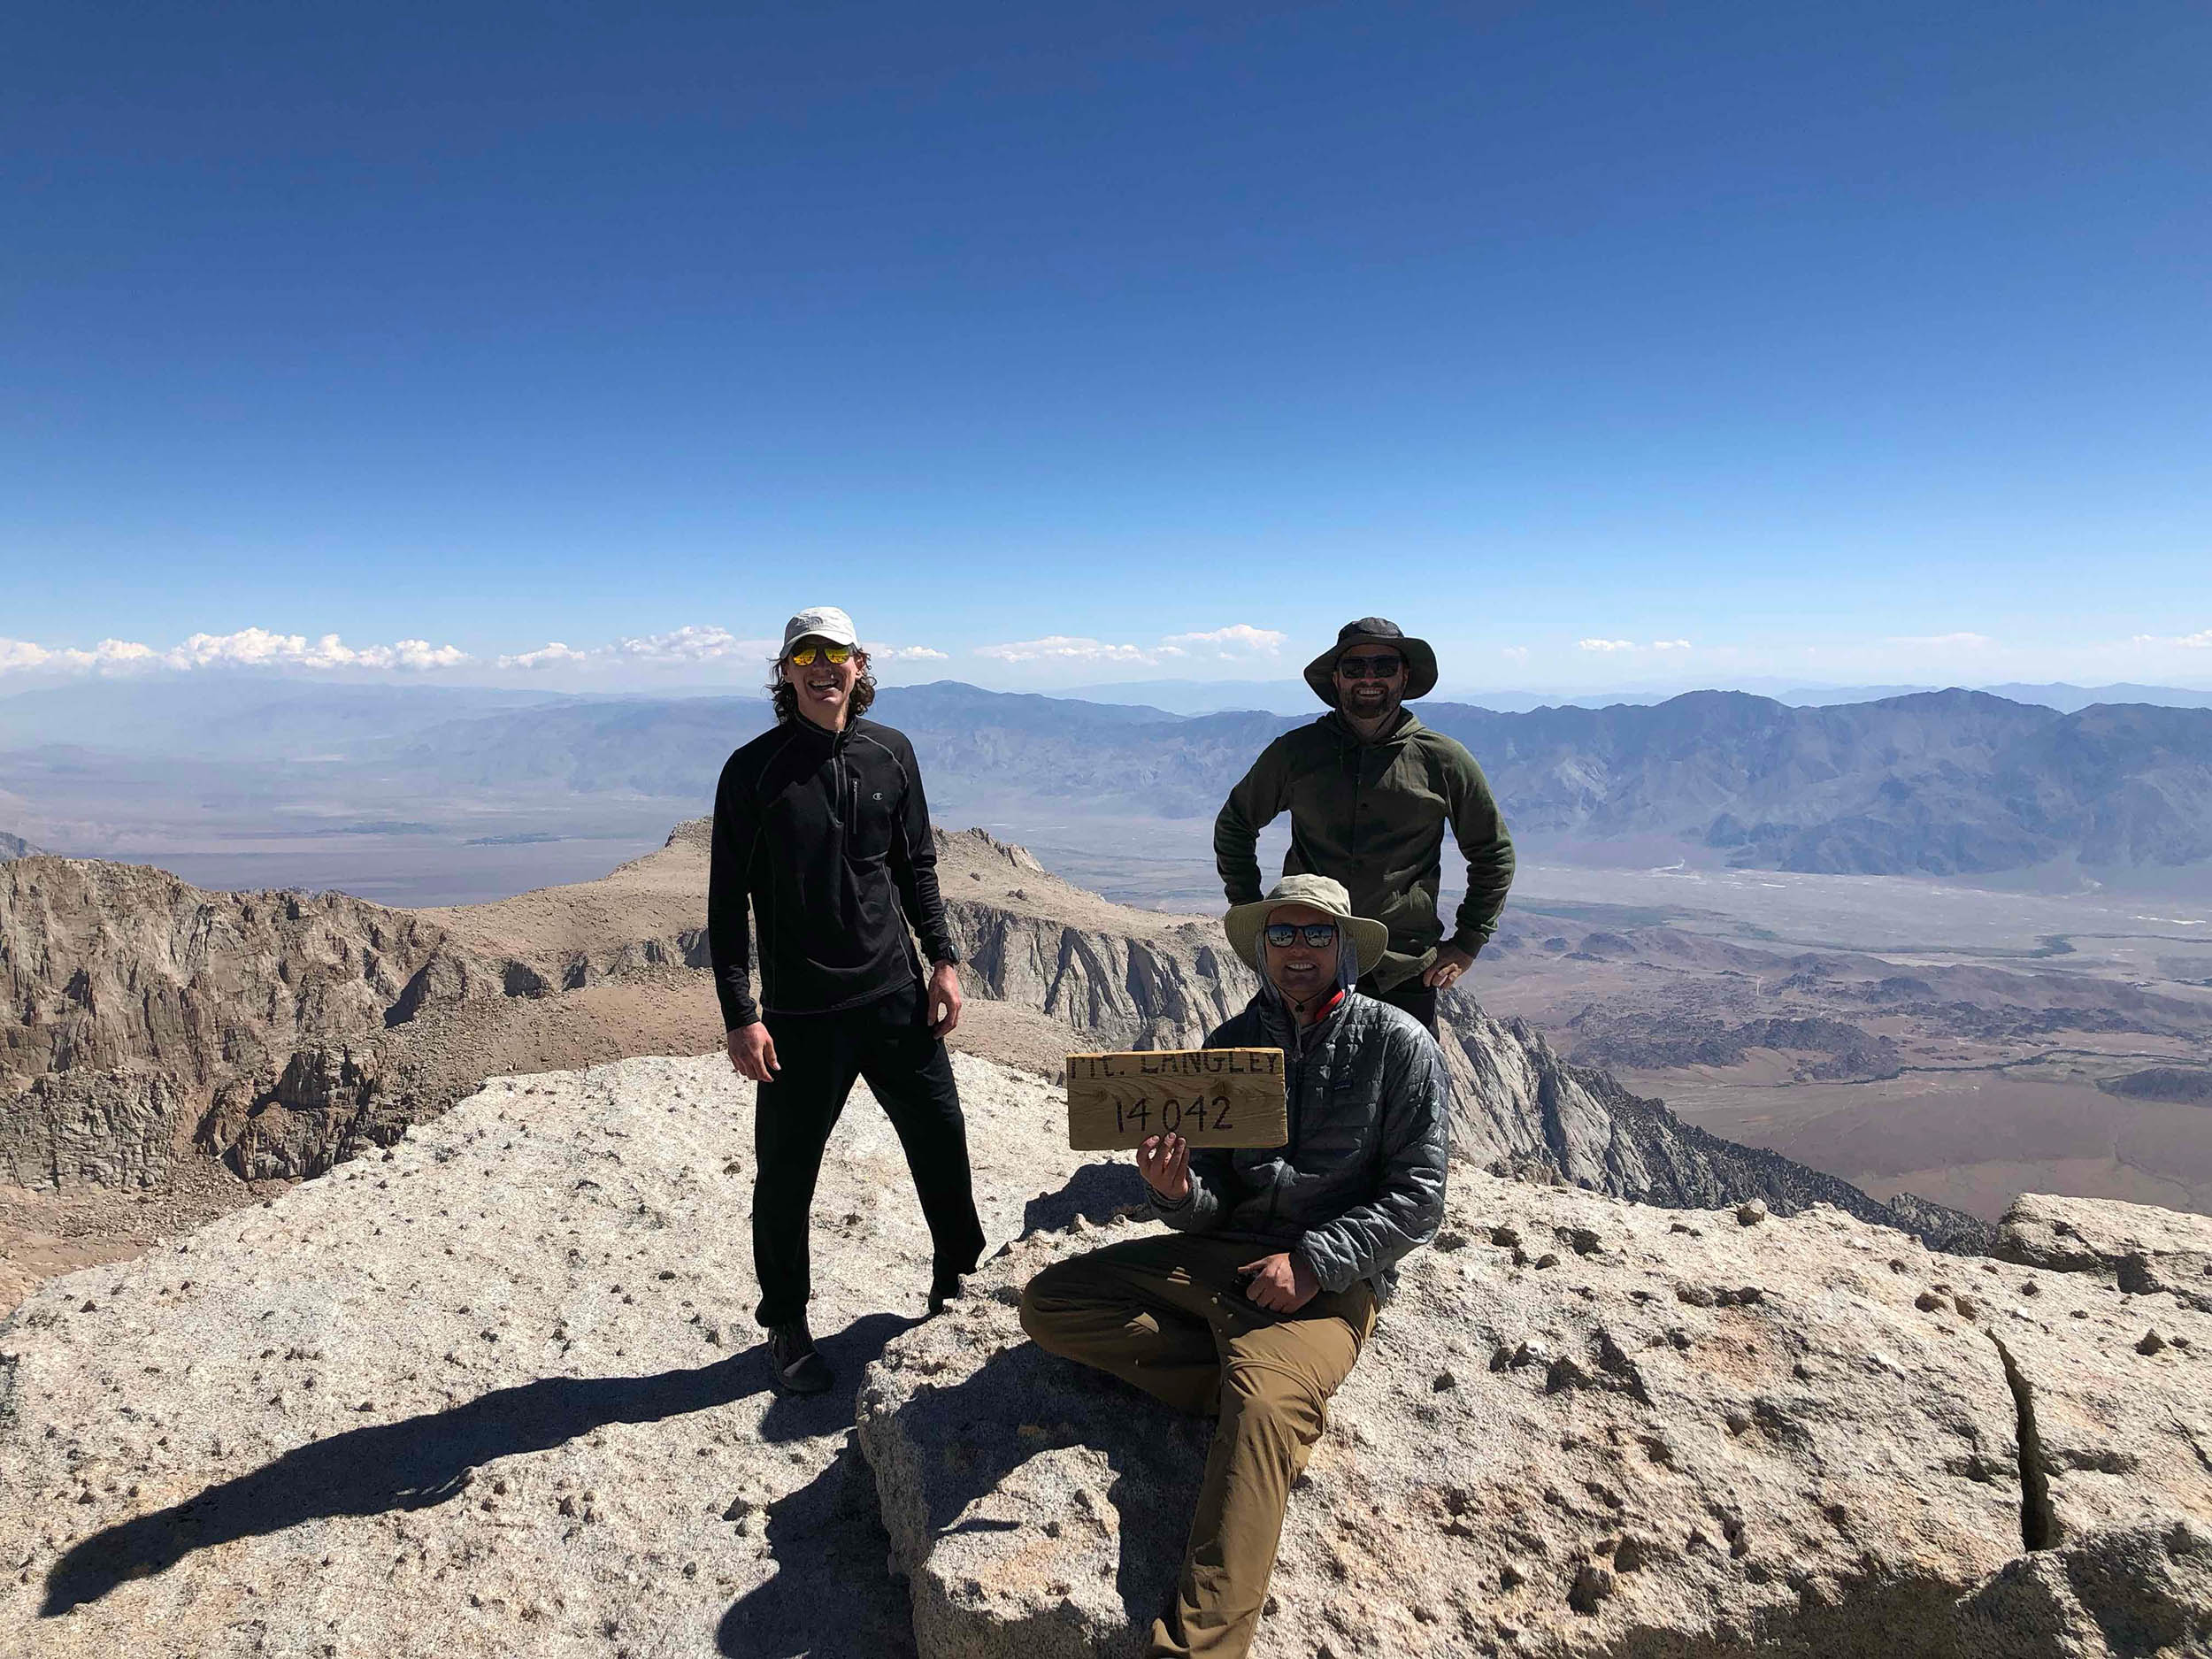
But then, finally, after roughly 9 hours of hiking, we made it to the top. Mt. Langley was one of the most amazing summits I’ve experienced — much more intense and dramatic than Mt. Whitney, in my humble opinion.
We summited at about 9:30 a.m. and spent about an hour at the top taking photos, eating snacks, and basking in glory.
The day could not have been much better: practically no wind and no precipitation. The trails were in great shape too, with no snow or ice in our path at any point along the journey.
And then, at about 10:30 a.m. we began the long horrible trek all the way back down.
Return trips are the worst and they always seem to take longer than expected. As it got later in the day the sun started to beat down on us, especially as we made our way down the switchbacks on the side of the mountain.
On the way back we stopped a handful of times to rest, enjoy the shade, and muster up mental strength. After seemingly endless trudging, the glorious trailhead and parking lot finally, miraculously, appeared. By the time we finished it was 6 p.m. and we were all exhausted and pretty delirious.
Nevertheless we all remained in great (good) spirits and were happy (once we finished at least) to have gone the extreme midnight-run route to Mt. Langley.
I still want to summit Mt. Whitney again, but Mt. Langley in a day was a truly epic Plan B, and an intense, unforgettable highlight of an already awesome summer.

Gear
Here’s my packing list for the hike and trip.
- Bear canister (Left at the campsite because it’s only required if you camp along the trail.)
- WAG Bag (Aka Toilet in a Bag, Human Waste Sacks; these are required; pooping in holes on the trail is prohibited; full disclosure, I forgot to pick these up before we started, thankfully it was a poopless hike.)
- Tent, sleeping bag and insulating sleeping pad (All left at campsite during the hike.)
- Backpack
- Trail running shoes
- Headlamp with spare batteries
- Clothing
- Short sleeve synthetic shirt
- Long sleeve light polyester sweatshirt
- Light polyester puffer jacket
- Down puffer jacket
- Rain jacket
- Light running sweatpants
- Running shorts underneath
- Warm beanie
- Hat for sun protection
- Gloves
- Quick-dry towel
- Water filtration system (Sawyer Squeeze with 2-liter CNOC bladder)
- Leatherman utility knife
- Sun screen
- Lip balm
- Sunglasses
- First Aid Kit
- Bivy bag
- Map and compass
- Large garbage compactor bag for rain cover (unused)
Nutrition
This was my first hiking trip going pretty much full keto, without cooking or using any stoves. It worked out great, I felt great, and it gave me confidence that I’ll be able to adopt this same fat-burning beast nutrition philosophy on future hikes and adventures. I took a lot of my cues here from this great guide by Alpine Science.
- Cured meats and jerky
- Cheese
- Almond butter supreme (8 oz. of almond butter mixed with two sticks of butter; sounds weird, and it is, but it’s also delicious!)
- Trail mix (macadamia nuts, pumpkin seeds, almonds and 100% dark chocolate chips)
- Protein shake (collagen peptides, whey protein isolate and maca root powder mixed with 700 mL of water)
- Avocados (not brought on hike, but delicious campsite grub)
- DIY sports drink mix (1 tsp iodized salt, 1 tsp potassium chloride salt substitute, and Crystal Light pink lemonade mixed with 1 liter of water; I drank one liter per day)
- Emergency, break-the-glass carb and sugar fuel: Clif Bar and SweetTARTS (didn’t eat)
Lessons learned for next time
1. Ditch the Smartwater bottles. Use two 1-liter Nalgene bottles and a smaller sports bottle, all with wide mouths.
I’m still figuring out the best way to carry water in my pack on hikes like this. I have a Hyperlite Mountain Gear 2400 Southwest pack with an internal volume of 40 liters and a load capacity of up to 40 pounds. I try to keep the weight to a minimum while maintaining relative comfort and convenience.
Many ultralight hikers advocate for carrying two 1-liter Smartwater bottles in the pack’s side pockets.
The benefits of this approach are: 1) those plastic bottles are very light, slim, durable and reusable; 2) the bottles have openings with threads that fit the Sawyer Squeeze water filtration system; 3) you can get them pretty much anywhere; 4) storing the bottles in the outside pockets of the pack (as opposed to carrying them inside the pack itself) ensures they won’t spill or leak on the stuff you want to keep dry inside your pack; and 5) drinking from bottles (as opposed to a bladder stored in the pack) helps you keep an eye on how much water you’re drinking and how much you have left.
That Smartwater bottle approach also has some drawbacks: 1) it’s tough — impossible, in my case — to access the bottles in the side pockets while wearing the pack; 2) if you fall the bottles could slip out of your pack — and tumble down the mountain never to be heard from again, as I experienced hiking Maroon Bells Four Pass Loop a couple years ago; 3) the bottle openings are tiny making it painful and messy to pour in salts and sports drink mixes; 4) they’re so light that when empty they easily get blown away or dropped if left unsecured.
On this hike I went with a hybrid approach and used one 1-liter Smartwater bottle for plain drinking water, one 1-liter Nalgene bottle for water mixed with DIY sports drink (mentioned above), and one empty 700-mL sports bottle for mixing protein shakes. I carried all of these in the side pockets and used the Sawyer Squeeze water filtration system to turn lake water into drinking water.
I still like carrying all the water in the side pockets, as opposed to carrying a water bladder inside the pack, for benefits 4 and 5 noted above (dryness and visibility).
However, on the next hike I’m going to ditch the Smartwater bottles and use two 1-liter Nalgene bottles instead (one for the sports drink mix, and one for plain water), and still carry the extra 700-mL sports bottle for protein shakes.
I still won’t be able to access the bottles on the fly from the side pockets while wearing the pack; however, it might be a good practice to stop briefly and take the pack off for water breaks every 30 to 45 minutes.
The main reason I’m opting for Nalgene bottles over Smartwater bottles is the wide openings that will make it both easy to fill from the Sawyer Squeeze, and easy to add sports drink mix. In addition, the attached caps and heavier weight means I am less likely to drop them as much along the trail or at the camp site.
Furthermore, I also like the strategy of designating one Nalgene bottle for plain, unscented, drinking water. This way you can keep it nearby and easily accessible at the campsite, while you stash the other two bottles 100 feet away with your bear canister and other scented items.
Finally, I think you can minimize the potential for losing the bottles by strapping them in tight to the side pockets, and also trying not to fall.
While this Nalgene approach sacrifices some weight compared to Smartwater bottles, overall I think it will be a much more convenient hydration strategy. Time will tell.
2. Use the push/pull cap on the Sawyer Squeeze water filter.
My water filtration system consisted of the Sawyer Squeeze filter, the CNOC Vecto 2-liter bladder (used only for gathering and storing unfiltered water) and the Sawyer Coupling adaptor (used to connect to the Smartwater bottles to avoid spills).
Basically I would collect water in the bladder from the lake, stream or campsite tap; attach the bladder to the dirty (in-flow) end of the Sawyer filter; attach the Smartwater bottle to the clean (out-flow) end of the filter; and then squeeze the water from the bladder through the filter directly into the Smartwater bottle.
This was my first time using the Sawyer Squeeze system and it worked fine.
My only complaint was that I fumbled around with bottles and caps a lot as I filled one bottle and moved on to fill the next bottle. To be fair, part of this was just newbie user error.
But another part was because I didn’t cap the filter when switching from filling Smartwater bottle one to Smartwater bottle two.
The solution is easy: use the push/pull cap that came with damn water filter.
I wasn’t using it because I was set on attaching the filter directly to the Smartwater bottles, using an adaptor in place of the push/pull cap. That seamless connection didn’t really make the process all that easier compared to using the push/pull cap and simply squeezing the filtered water into the wide mouth of the other Nalgene bottle I brought along.
Ditching the Smartwater bottles (as noted in the previous lesson above) partially solves this problem. By using the push/pull cap on the clean (out-flow) end of the filter, I can easily cap it off once the bottle is filled and avoid the spills and fumbling around that accompanied the uncapped filter I used on this hike.
3. Portion out the day’s nutrition and keep it in a dry bag on the outside pocket of the pack.
This keeps all the food you’ll need while hiking for the day easily accessible without having to rifle through your pack. On this hike I pretty much did this anyways since we were only hiking for one day, but it will be a good practice for multi-day hikes as well. This way when you stop for a quick snack you don’t have to sort through all your food to pick out what you want to eat eat.
4. Organize nutrition in bags for daily portions and categories.
This just makes it easier to find stuff when you’re rifling through the food bag or bear canister. For example, on this trip I packed four bags of daily protein powder shake mixes, and four bags of daily sports drink mixes. These bags are pretty easy to tell the difference, but when they’re moving around loose in the food bag it’s a bit of a pain to pick out which is which. So instead, group all the daily protein powder bags into one bag, and group all the daily sports drink mixes into one bag, and so on and so forth. It’s a simple fix but it will help keep things organized.
5. Stake out the tent footprint first, then attach the tent and fly.
This is camping 101 but I hadn’t been camping in a couple years and my first night setting up my tent was kind of an ordeal. My tent is ridiculously easy to set up too. My problem was that I wasn’t very judicious about staking out the tent’s footprint so that I’d have something stable to latch into when attaching the tent. Instead I attached the tent to the footprint without staking it in and when gusts of wind would blow through, pretty much everything would collapse and get blown out of place. The second night was much easier and I’m sure this rule will stick with a bit more repetition.
6. Use a compactor bag as a pack liner
This lesson wasn’t applicable to this hike because it didn’t rain; however, this is an easy and cheap way to waterproof your pack and keep your gear dry. You basically put all your gear in a big trash compactor bag and then put the compactor bag in your pack.
With this approach I would just stuff my sleeping bag at the bottom of my bag (loose, not rolled up) to let it squeeze into the very bottom corners of the pack and minimize the amount of space it takes up in the pack. I’d still keep my clothes in their own small dry bag, and other loose gear and items in another small dry bag. If it’s not wet I’d then keep my tent squeezed down in the pack on top of my sleeping bag; and if the shelter is wet I’d roll up the compactor bag with my sleeping bag and clothes in it and then pack the tent and shelter on top of the compactor bag so that its kept separate from the other stuff in the pack.